
Last updated October 16, 2026
 Wrought iron
 Wood & steel frame
 Farm & ranch
 Sliding driveway gates
 LiftMaster operators
Free on-site gate assessment - hinges, posts, and your LiftMaster or Nice gate operator checked before anything is quoted
The assessment is free and the quote is the invoice.
Get your free estimateDIY vs Professional Gate Repair: The Orlando Homeowner’s Decision Guide
The most common DIY gate repair mistake in Florida isn’t a botched installation. It’s replacing a $45 battery when the actual problem is a $180 control board that fried in a lightning surge. We see it every week in Orlando, from Dr. Phillips to Winter Park: a homeowner swaps out what seems like the obvious part, the gate still won’t move, and now there’s a new part installed that wasn’t the problem. This guide walks you through which gate repairs are genuinely safe to do yourself, which ones will cost you more if you try, and how to tell the difference before you spend a dime.
Quick Answer
DIY gate repair in Orlando makes sense for about 20% of common problems: remote reprogramming, battery swaps, basic lubrication, and cleaning photo-eye sensors. The other 80% involves components where misdiagnosis is expensive or the work itself is dangerous. If your gate opener is more than 5 years old, stopped working suddenly after a storm, or shows multiple symptoms at once, professional repair is almost always the cheaper path when you factor in diagnostic accuracy and a written guarantee.
Styles & brands we work with
Table of Contents
- The Real Cost of Guessing: Why Diagnosis Matters More Than Skill
- DIY Suitability Chart: Which Repairs Are Safe, Which Aren’t
- The Three Diagnostic Mistakes Orlando Homeowners Make Most
- Florida-Specific Risks: Rain, Lightning, and Pool Barrier Statutes
- The Real Cost Comparison: DIY vs Professional Repair
- When to Stop a DIY Attempt and Call a Tech
- Why Professionals Get It Right the First Time
- Common Mistakes to Avoid
- When to Call a Professional
- Frequently Asked Questions
- The Bottom Line
The Real Cost of Guessing: Why Diagnosis Matters More Than Skill
Here’s the thing nobody tells you about gate repair: the hard part isn’t turning a wrench. It’s knowing which part to turn. Most Orlando homeowners who attempt DIY gate repair are mechanically capable. They can follow a YouTube video. What they can’t do is run a proper diagnostic sequence that isolates whether the failure is electrical, mechanical, or structural.
Think about it this way. A gate that won’t open could be caused by at least nine different failures: a dead battery in the remote, a failed limit switch (the small sensor that tells the gate when to stop), a stripped gear, a blown capacitor, a fried control board, a broken hinge, a misaligned photo-eye (the safety sensor that stops the gate if something is in the path), a wiring short, or a motor that’s simply worn out. Each of these has a different fix and a different price tag. Replacing any one of them without confirming it’s the culprit is a $50 to $400 gamble.
In our experience, somewhere around half of all gate opener repairs we perform in Orlando follow a DIY attempt on the wrong component. The homeowner spent money, spent a Saturday, and still has a gate that doesn’t open. The repair didn’t fail because they lacked skill. It failed because they lacked the diagnostic framework to identify what actually broke.
This is the core of the DIY vs professional question, and it’s not about ego. It’s about information asymmetry. A trained tech who works on Linear, Viking, Ghost Controls, and DoorKing openers every week has seen hundreds of failures. They recognize patterns: this symptom plus that age plus that brand usually means this specific failure. You can’t get that from a single YouTube video about your specific model.
DIY Suitability Chart: Which Repairs Are Safe, Which Aren’t
Not all gate repairs are created equal. Some are genuinely appropriate for a careful homeowner. Others are dangerous, warranty-voiding, or simply too easy to screw up. Here’s a component-by-component breakdown based on what we see in Orlando homes.
Safe for DIY (With Basic Tools and Patience)
- Remote control reprogramming: If your remote stopped working after a power outage or you bought a new one, most brands like Linear and Ghost Controls have a simple learn button on the control board. The instruction manual walks you through it. This takes 10 minutes and requires no disassembly.
- Backup battery replacement: Gate openers run on a 12V or 24V battery that charges from the main power. These batteries typically last 3 to 5 years. Swapping one is like changing a car battery: disconnect the old one, connect the new one. Just make sure you buy the right amp-hour rating.
- Basic lubrication: Hinges, chain drives, and screw drives benefit from lubrication every 6 to 12 months, especially in Orlando’s humidity. Use a lithium-based grease on metal-to-metal contact points. Don’t use WD-40, which is a solvent and will strip existing lubrication.
- Photo-eye cleaning and alignment: If your gate starts to close then reverses, or won’t close at all, the photo-eye sensors may simply be dirty or misaligned. Wipe the lenses with a dry cloth and make sure both sensors point directly at each other. This is the single most common non-failure “repair” in gate systems.
Needs a Professional (Don’t Attempt These)
- Control board replacement: This is the brain of the opener. Even if you correctly identify a failed board (which is harder than it sounds), installation requires matching revision numbers, transferring wiring from the old board, and configuring onboard settings. Get it wrong and you can damage the new board on first power-up. We stock boards for DoorKing and Viking specifically because they’re so frequently misdiagnosed.
- Motor replacement: Gate motors are heavy, wired to capacitors that hold a charge even when the power is off, and often positioned awkwardly inside the opener housing. A capacitor discharge can give you a genuinely unpleasant shock. This is not a Saturday morning project.
- Wiring diagnosis and repair: Gate systems have low-voltage control wiring, line-voltage power wiring, and safety loop wiring. Tracing a short or an open circuit requires a multimeter and an understanding of what each wire should read. Guessing here can create a fire hazard.
- Hinge or structural welding: If your gate is sagging or dragging on the ground, the hinge post may have shifted in Orlando’s sandy soil. This requires re-setting posts in concrete or welding. Without proper alignment, any new opener parts will just wear out faster.
- Any repair involving high-tension springs: Some older swing gates use counterbalance springs. These are under enormous tension and can cause serious injury if released incorrectly. Never attempt this yourself.
The Three Diagnostic Mistakes Orlando Homeowners Make Most
When a gate fails, the symptom is usually obvious: it won’t open, it won’t close, or it moves the wrong way. The cause is rarely obvious. These are the three misdiagnoses we encounter most often in Orlando when we visit homes after a DIY attempt didn’t work.
Mistake #1: Assuming it’s the battery when it’s actually the board. A gate opener remote that doesn’t work is often blamed on the remote’s battery. Homeowners replace the $5 coin cell, the remote still doesn’t work, and now they’ve narrowed it to: the remote itself, the receiver in the opener, or the control board. Central Florida afternoon thunderstorms produce lightning surges that damage control boards far more often than they drain batteries. If multiple remotes stop working at the same time, it’s almost certainly not a battery problem. Try reprogramming one remote. If it won’t learn, the receiver or board is likely dead.
Mistake #2: Blaming the motor when the gate is actually physically stuck. When a gate hums but doesn’t move, or moves a few inches and stops, the motor is trying to work. That’s actually a good sign: it means the motor windings are intact and power is reaching the unit. What’s more likely is that a hinge has seized, a wheel has broken on its track, or debris is physically blocking travel. In Orlando, salt air near coastal areas accelerates corrosion on hardware. The test: disengage the opener using the manual release (usually a red handle or key on the side of the motor housing) and try to push the gate by hand. If it’s hard to move manually, the problem is mechanical, not electrical. Don’t replace a motor until you’ve ruled out physical resistance.
Mistake #3: Replacing the photo-eye sensor when the real problem is the wiring to it. Photo-eye sensors are mounted low on the gate posts and take abuse from sprinklers, landscape equipment, and Florida lawn mowers. It’s tempting to swap out the sensor units themselves. But the wiring that connects those sensors to the control board runs underground or through conduit, and in Orlando’s sandy, shifting soil, those wires chafe and short. The test: check if the LED indicator on each sensor lights up when the gate is powered. If one sensor shows no light at all, check the wiring connection before buying new sensors. If the light flickers when you wiggle the wire, you’ve found your problem.
Florida-Specific Risks: Rain, Lightning, and Pool Barrier Statutes
Orlando adds a few complications to gate repair that homeowners in other parts of the country never think about. These factors push the calculation further toward professional help, and not just because they’re technically difficult. Some of them carry real legal consequences.
Rainy Season Electrical Work
From June through September, Orlando gets daily afternoon thunderstorms. Gate opener motors and control boards run on line voltage (120V or 240V) stepped down to low voltage for controls. Working on electrical components during or immediately after rain, or even in high humidity with wet hands, creates a shock risk that simply doesn’t exist for dry-weather states. Capacitors inside gate openers store charge even when the opener is unplugged. A capacitor discharged into wet skin is dangerous. If you’re going to do any electrical work on your gate at all, do it on a dry day, with the power disconnected at the breaker, and even then, know which components are safe to touch.
Lightning Surge Damage
Central Florida is the lightning capital of the United States. The Orlando area averages roughly 90 thunderstorm days per year. What this means for gate openers is simple: control boards and capacitors take damage from nearby strikes even when your house doesn’t lose power. A gate that worked before a storm and will not open after is often a surge-damaged control board. The damage isn’t always visible. Sometimes it’s a hairline fracture in a solder joint or a blown component on the board that looks cosmetic. Homeowners routinely misdiagnose surge damage as a dead backup battery because the symptoms feel the same: the gate suddenly stops responding to remotes and the keypad. If the opener shows no signs of power at all, check the breaker first. Then check for an inline fuse (many Viking and DoorKing openers have one). If the fuse is intact and there’s no power, it’s the board, not the battery.
Pool Barrier Gate Compliance
This is the big one that almost no DIY guide mentions. Florida statute 515.29, the Residential Swimming Pool Safety Act, requires that any gate providing access to a pool area be self-closing and self-latching, with the latch at a specific height. If your gate opener is on a pool access gate, DIY repairs that leave the gate unable to self-close, or that disable the auto-close function, put you on the wrong side of the law. More importantly, they put children at risk. A gate opener that isn’t properly configured to close and latch every time is a drowning hazard. Professional gate repair on pool-barrier gates includes verifying auto-close timing, latch engagement, and safety-loop function. A homeowner who disables a photo-eye to “stop the gate from reversing” has just created a dangerous condition. If your gate is a pool barrier, don’t attempt any repair that touches safety features. This is genuinely a case where the stakes justify the cost.
Manufacturer Warranty Voiding
LiftMaster, along with most other major brands including Linear, Viking, Ghost Controls, and DoorKing, states in their warranty terms that unauthorized repair or modification voids the warranty. That doesn’t just mean you lose coverage on the part you worked on. In many cases, the entire opener warranty is voided if the manufacturer determines that non-approved parts or workmanship contributed to a later failure. For openers under 5 years old, even a successful DIY repair can mean the next failure is entirely on you. A licensed repair carries no such risk.
The Real Cost Comparison: DIY vs Professional Repair
Let’s put actual numbers on what DIY gate repair costs in Orlando when you account for misdiagnosis. We’re going to be blunt here, because this is the part most “DIY vs Pro” articles skip.
Here’s a typical scenario we see at Calder Gate Repair (see our Gate Repair Maintenance Checklist for Orlando Homeowners for prevention tips): a homeowner in Conway has a Viking opener that won’t respond to remotes. They search online, find a forum post that says “sounds like the logic board,” and order a replacement board for $180. The board arrives, they install it, and the gate still doesn’t work. Now they call us. Our tech arrives, diagnoses a bad limit switch ($40 part, 45 minutes of labor), and replaces it. The gate works. Total cost to the homeowner: $180 for the wrong board (plus shipping, plus their time installing it) plus the professional repair they needed in the first place.
The same repair done professionally from the start would have been the cost of the limit switch plus labor. That’s it.
Here’s a realistic breakdown of what professional gate opener repair costs in Orlando, before parts:
| Repair Type | Typical Cost Range | Notes |
|---|---|---|
| Diagnostic visit | $65 – $95 | Often credited toward the repair if you proceed |
| Remote programming / minor adjustment | $75 – $120 | Usually same-visit, no parts |
| Limit switch replacement | $140 – $220 | Includes part and labor |
| Photo-eye replacement or realignment | $110 – $190 | Most common repair |
| Control board replacement | $250 – $450 | Board cost varies by brand |
| Full motor replacement | $400 – $850 | Depends on opener model |
| Hinge or hardware repair | $120 – $300 | No electrical work involved |
Most gate opener repairs run $140 – $350 before parts are added. The diagnostic visit usually gets credited toward the repair, so you’re not paying a separate charge for someone to tell you what’s wrong.
Now compare that to DIY costs when things go wrong:
- Wrong part purchased: $40 – $200 (usually non-returnable for electrical parts once opened)
- Tool purchases for one-time use: $25 – $100
- Time spent researching, ordering, waiting for shipping, and installing: 4 – 12 hours of your weekend
- Cost of the professional repair you still eventually need: same as above, but often higher because the failed DIY attempt may have introduced new problems
The math usually tips toward DIY only when the diagnosis is certain and the part costs less than $75. That’s why remote batteries, remote reprogramming, and basic lubrication remain genuinely good DIY territory. The cost of being wrong is low.
When to Stop a DIY Attempt and Call a Tech
One of the most valuable skills in DIY gate repair is knowing when to walk away. Here are the decision points that signal you should stop what you’re doing and call a professional. These are the moments where continuing makes the problem worse.
- You’ve replaced the part you thought was bad, and the gate still doesn’t work. Stop there. You’ve proven the original diagnosis was wrong, and every additional part you replace is another guess. The next guess may work, or you may be three guesses deep and $400 in with a still-broken gate and a pile of parts that can’t be returned.
- You’ve opened the control board housing and there’s visible scorching, melted plastic, or a burning smell. This means the failure source is more serious than you thought, and continuing risks shock or fire. Close the housing, disconnect power at the breaker, and call a tech.
- You’ve removed a cover and found more wiring than expected. Gate openers have more connections than the manual diagrams suggest: safety loops, exit wands, keypads, photo-eyes, solar panels, and backup batteries all terminate at the board. If you’re not confident which wire goes where before you start, don’t start. Reconnecting wires incorrectly is the fastest way to convert a $100 repair into a $450 repair.
- The gate is heavy and you’re working alone. Swing gates weigh anywhere from 300 to 1,500 pounds. Even with the opener disengaged, moving a heavy gate to access hinges or track wheels is a two-person job at minimum. Wedging it open with a cinder block to “hold it” while you work underneath is how people get hurt.
- The problem involves multiple symptoms or intermittent behavior. A gate that works sometimes but not others, or that opens but doesn’t close, often indicates a failing component that hasn’t fully died yet. Intermittent problems are the hardest to diagnose because the symptom is never present when you want it to be. This is where a tech’s pattern recognition from doing this every day is worth every dollar of the diagnostic fee.
- It’s a pool barrier gate, and the repair involves any safety feature. As covered above, this is the point where you stop and call. The stakes are too high to experiment.
Why Professionals Get It Right the First Time
This is the part where we explain what you actually pay for when you hire a pro. The value isn’t in the bolt-turning. It’s in these four things.
Diagnostic speed and accuracy. A trained technician who works on gate openers five days a week has seen hundreds of failures across Linear, Viking, Ghost Controls, and DoorKing systems. They recognize a failed start capacitor by sound, a failing limit switch by the gate’s jittery movement, a board problem by which LEDs are lit. What takes a homeowner four hours of forum research takes a tech 20 minutes on site. The diagnostic is the single most valuable part of the visit, which is why Calder Gate Repair doesn’t charge separately for it when we do the repair.
Parts that match the opener. Gate opener parts aren’t interchangeable the way light bulbs are. A limit switch for a Viking G-5 is not the same as one for a DoorKing 9150, and using an aftermarket part that “looks similar” can cause premature failure of the new component or stress on connected parts. Professionals use factory or factory-equivalent parts matched to the specific revision of your specific opener.
A written guarantee. When you do a DIY repair and the gate breaks again in three weeks, you get to do the repair again. When a professional repair fails within the guarantee window, the company comes back. The 365-Day Done Right Promise from Calder Gate Repair means exactly that: if the repair fails within 365 days, we return at no charge to make it right. A written guarantee on every repair, always. That’s something no DIY repair comes with, because there’s no one to call when your own work fails.
Insurance and safety. Professional gate repair involves line voltage, heavy moving parts, and precision alignment. When a pro does the work, it’s covered by the company’s insurance if something goes wrong. When you do it yourself, it’s covered by your weekend. For anyone who values time and certainty, that’s an easy trade.
Common Mistakes to Avoid
- Replacing all four photo-eye sensors when one was just dirty. Photo-eyes get dusty fast in Orlando’s dry spring and pollen-heavy early summer. Cleaning the lenses takes 30 seconds. Four new sensors costs $120 and the problem was never electrical.
- Buying a new remote before checking if the old one just needs reprogramming. Power interruptions from Orlando thunderstorms routinely erase opener memory. The remote may be perfectly fine. Reprogram it first. Replacement remotes only when programming fails.
- Using WD-40 on gate hinges and chains. WD-40 is a solvent and water displacer. It strips grease and leaves metal unprotected. Use white lithium grease or a silicone-based lubricant on gate hardware. Orlando humidity will rust unlubricated parts fast.
- Disabling photo-eye sensors because “the gate keeps reversing.” The gate reverses because something is blocking the sensor beam or the sensors are misaligned. Disabling them eliminates a required safety feature, and on pool-barrier gates, puts you out of compliance with Florida law. Fix the sensor, don’t bypass it.
- Assuming the opener motor is bad because it hums. A humming motor is a motor receiving power. The problem is usually downstream: a seized gear, a blocked track, or excess friction. Check the manual release and push the gate by hand before buying a $500 motor.
- Attempting to replace a capacitor without draining it. Start capacitors in gate openers store charge even with power off. Touching the terminals without a proper discharge tool is a genuine shock risk. If you don’t know how to safely drain a capacitor, leave it alone.
- Ignoring the gate after a storm and hoping it “fixes itself.” Lightning-damaged boards sometimes show intermittent symptoms before failing completely. A gate that “acts weird” after a storm but still works is likely in the middle of dying. Addressing it now is cheaper than an emergency call when it’s fully dead.
When to Call a Professional
Call a professional when your gate won’t move and you’ve verified it’s not a dead remote battery, a tripped breaker, or an obstructed photo-eye. Call when you’ve already replaced the part you thought was the problem and the gate still doesn’t work. Call when the repair involves electrical components, high-tension hardware, or pool-barrier safety features. Call when the opener is under warranty and unauthorized repair would void it. Call when the gate is heavy, you’re working alone, and the plan involves wedging it open with something found in the garage.
Calder Gate Repair Orlando offers free estimates in Orlando. Call (850) 338-6230 and explain what your gate is doing. A live person answers, every time. We’ll give you a straight answer about whether it’s worth a service call or whether it’s something you can handle from the driveway.
Frequently Asked Questions
Most gate opener repairs in Orlando run between $140 and $350 before parts, with diagnostic visits typically costing $65 to $95 and credited toward the repair if you proceed. Part costs vary by brand: a limit switch might be $40, while a replacement control board for a DoorKing or Viking opener can run $250 or more. Calder Gate Repair gives a written price before any work starts, so the number you agree to is the number on the invoice. Call (850) 338-6230 for an exact quote on your specific opener.
Yes, for a narrow set of tasks: remote reprogramming, backup battery replacement, photo-eye cleaning, and basic lubrication are all reasonable DIY projects if you’re comfortable with basic tools. Beyond that, the diagnostic complexity and safety risks make professional repair the better value. Most failed DIY repairs we see in Orlando are the result of replacing the wrong part, not poor workmanship.
Photo-eye misalignment and limit switch failure are the two most common issues we address on gate openers in the Orlando area. After summer thunderstorms, we also see a spike in control board failures from lightning surges. If your gate stopped working after a storm and basic troubleshooting doesn’t resolve it, surge damage is likely.
Yes, significantly. Linear, Viking, Ghost Controls, and DoorKing openers each have their own designs, part numbers, and failure patterns. A tech who works on all of them weekly can diagnose faster and stock the right parts. A DIYer with a generic YouTube tutorial for a different brand is working from incomplete information, which increases the chance of misdiagnosis.
Most gate opener manufacturers including LiftMaster, Viking, and DoorKing state that unauthorized repair or modification voids the warranty. Even if the repair is done correctly, opening the control housing or using non-factory parts can lead to a denied warranty claim later. If your opener is under 5 years old and the failure may be covered, call the manufacturer before attempting any self-repair.
Yes, and this is important. Florida statute requires pool access gates to be self-closing and self-latching with the latch at a specific height. Any repair to a pool barrier gate must preserve these functions. Disabling auto-close, photo-eyes, or the latch mechanism to “fix” a gate problem is a violation of Florida law and a safety risk. If your gate is a pool barrier, any repair work should be done by a tech who understands the compliance requirements. Calder Gate Repair includes pool barrier compliance checks with every gate repair on pool access gates.
The Bottom Line
DIY gate repair works when the problem is simple and the cost of guessing wrong is low. Reprogram a remote. Swap a battery. Lubricate the hinges. Clean the photo-eyes. Those are real wins for a careful homeowner. But once the problem involves electrical diagnosis, high-tension hardware, pool barrier safety, or a part that costs more than $75 to gamble on, the math shifts hard toward professional repair. The most expensive DIY gate repair is the one that doesn’t fix the gate. For more guides & resources, visit our blog. Hire the diagnosis from someone who does it every day, and you’ll pay for the right part once instead of the wrong part twice.
Contact Calder Gate Repair Orlando
If your gate isn’t working right, call Calder Gate Repair Orlando at (850) 338-6230. A live person answers 24/7, not a voicemail or a chat bot. We’ll talk through what your gate is doing, give you an honest read on whether it’s worth a service call, and book a time that works for you. Every repair comes with a written price before work starts, a written guarantee, and the 365-Day Done Right Promise: if the repair fails within 365 days, we return at no charge to make it right. Serving Orlando and surrounding areas. Back to our Orlando home page or learn more about gate repair in Orlando, electric gate repair in Orlando, and gate opener repair in Orlando.
Written by Nico Alvarez, Owner at Calder Gate Repair Orlando, serving Orlando since 2009.
See the difference
 Before
 After
After Before
 After
After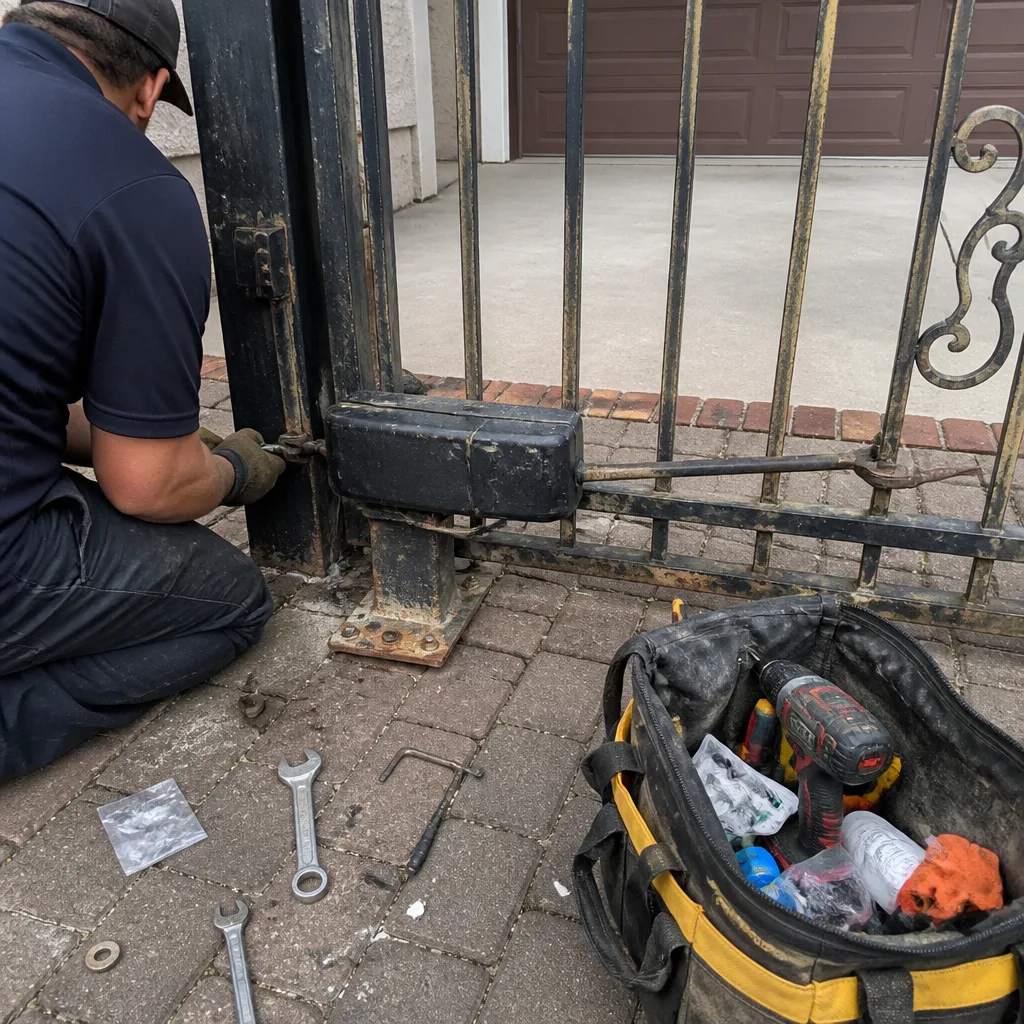 Before
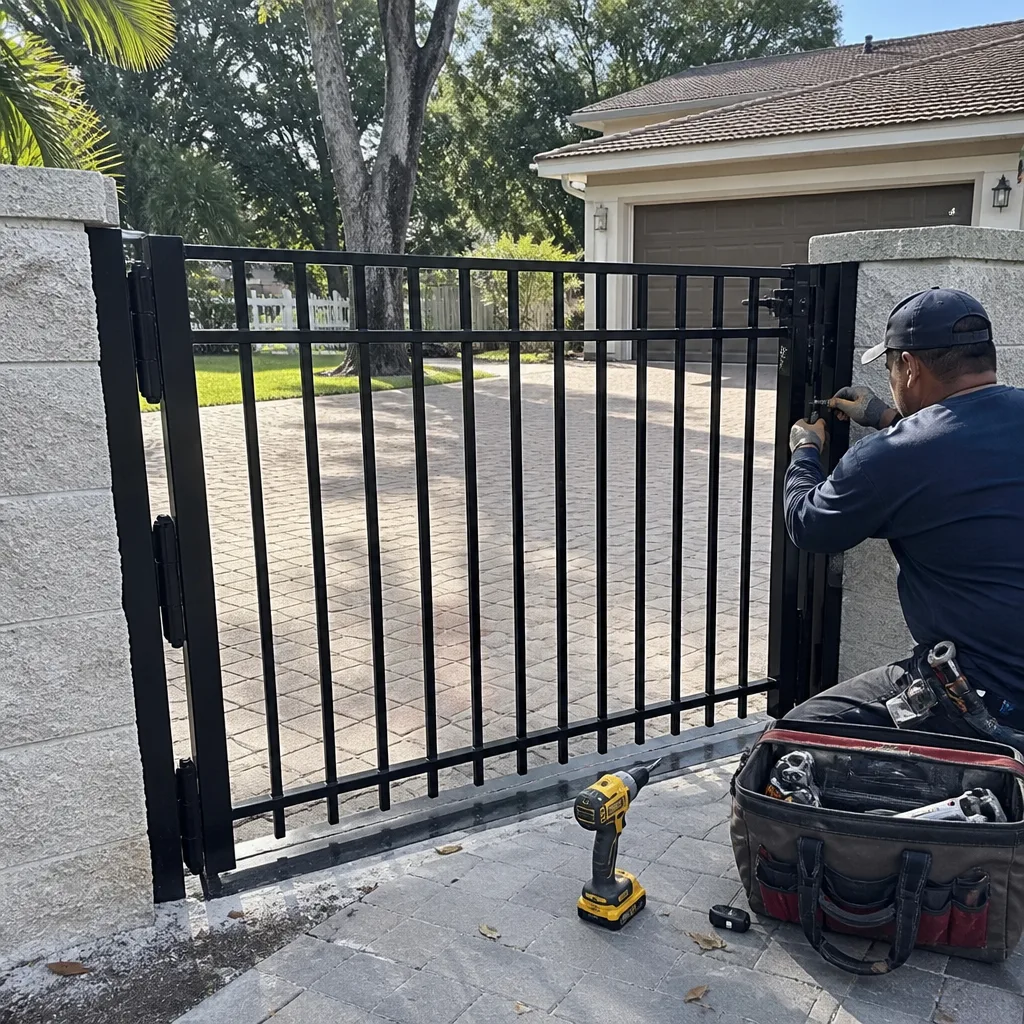 After
After